
My little top is done and I’ve decided to hand quilt it.

I’m hoping to finish the quilting today so I can bind it tomorrow and get it shipped off this week.
Have a lovely day!
My little top is done and I’ve decided to hand quilt it.
I’m hoping to finish the quilting today so I can bind it tomorrow and get it shipped off this week.
Have a lovely day!
I mentioned the other day that I didn’t have any measurements for this little vintage quilt, just a photo from the internet. I decided to make the small squares in the blocks to finish at one inch. I wanted to keep the sashing proportional. I thought you might be interested in how I figured out that measurement.
First I pulled up the photo of the original on my iPad. Then I zoomed in until the squares measured one inch on the screen. I used a tape measure to know how much to zoom in.

Then I used the tape measure to measure the width of the sashing. Easy!

I decided in the end to make my sashing to finish at 1 1/4 inch rather than an inch, but this was an easy way to figure it out without wasting fabric and ripping stitches.

Hope this helps someone. Have a great day!
I love making baby quilts! They are done so quickly. This first photo is not good. The sun was actually TOO bright! But since that is such a good problem to have, I decided to use it anyway.

It was good for showing off the quilting texture.

I love this panto called Splat!


I used one of my iron on labels.

This last photo shows the color most accurately.

Time to package it up and ship it off. Have a great day!
Linking up with Confessions of a Fabric Addict
Are you taking part in the String Along hosted by Lori at Humble Quilts? I’m making ten of these diamonds a month out of the scraps left of my dad’s shirts.
While visiting Daughter #3 recently, I found the perfect red for the alternate diamonds.

My dad’s shirts were mostly thin, poly/cotton, button downs so I decided to use fabric foundations that will stay in the quilt. It’s a good way to use up ugly fabric!

I cut the foundations using this Accuquilt studio die.

When I’m done sewing the strings on, I trim to the edge of the foundation piece. I’m linking up with Lori for the monthly String Along Update.
Have a great day!
This post contains affiliate links.
I’ve been multitasking lately. I am participating in a small quilt swap again. I found this little quilt on Pinterest and was quite taken with it so I decided to recreate it for the swap.

Apparently this little quilt was sold on eBay. The listing is no longer available so I have no info on it. I started by making two inch four patches for the center of the blocks. I don’t know the size of the original blocks.

Then I made 2 1/2 inch unfinished HSTs.

I cut them in half, corner to corner.

I need two sets of these for each small block. They are arranged as follows.

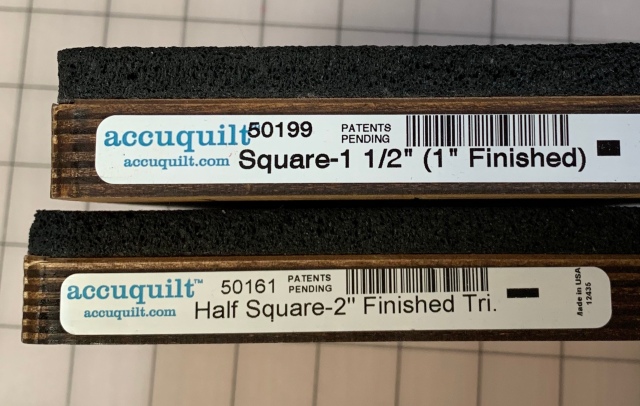
I used these Accuquilt dues to cut my pieces.
After trimming dog ears, I ended up with this little block.

8 more to go!
Also, I wanted to let you know that the sale on Studio dies and die cutters has been extended!

I’m pretty excited as there are a couple dies on my wish list and got busy over the weekend and forgot to order.
Have a great day!
This post contains affiliate links.
I’ve been working on this baby quilt.

I used these Accuquilt dies.

I also used my 2 1/2 inch strip cutter to cut dashing strips.then I used the 5 inch square die to subcut my dashing strips.


I made my binding while I was at it.

This should be quick to piece now. Have a great day!
This post contains affiliate links.
My niece is having a baby girl! So this great aunt is making a Jeep quilt. 
I cut my layer cake in half and then cut one half into 5 inch squares.

I wrapped up the leftover half layer cake for a future quilt.

Time to play! Have a good one!
This pretty top was put together by Cheryl. 
I quilted it with a panto called Ground Cover by Urban Elementz .

I had this one made in a 16 inch width.

It is pretty labor intensive and time consuming in the original 10 inch size, but still looks great enlarged.
I wanted to let you know that Accuquilt Studio dies are half off until midnight tonight.

Make sure you use the code shown above.
Have a great day!
This post contains affiliate links.
The beautiful top was made by Val. I used a panto called Techno on it.


The back was really pretty, the color is all wrong in this photo. Have a great day!
Kintsugi is the Japanese art of mending pottery and using gold to fill in the cracks. It means that each time a pot is broken and repaired, it becomes more beautiful. That is what I was thinking about as I made this piece. It is 19 inches wide and 29 inches long.

I quilted random vertical lines with a 60 weight thread.

All of the fabrics were hand dyed by me.

Once again, I used a facing rather than than a binding.


This will be my second entry for the local art show. Wish me luck!
Have a great day!
Linking up with Confessions of a Fabric Addict

