
I thought I’d share today how I add facings to a quilt. I prefer a facing to a binding on a modern wall quilt.
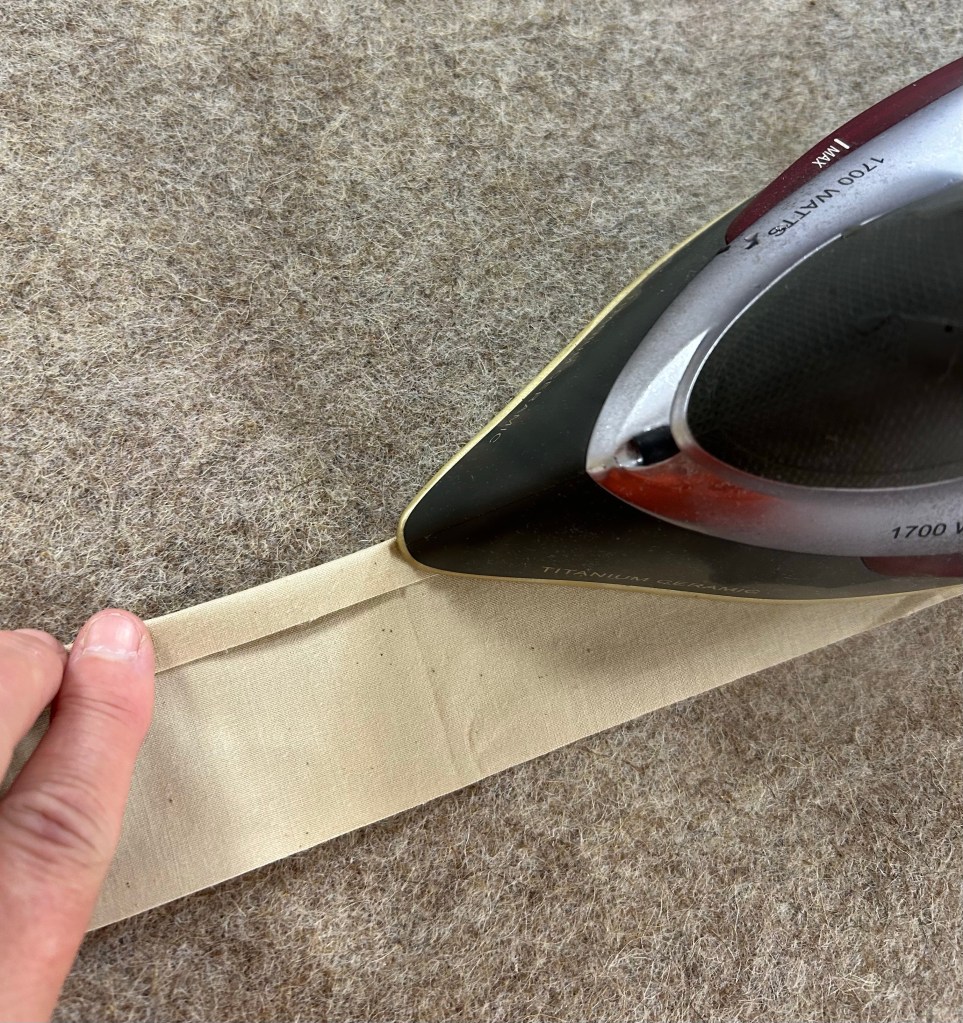
I cut my facing strips 2 1/2” wide. I fold over and press one edge about a quarter inch.

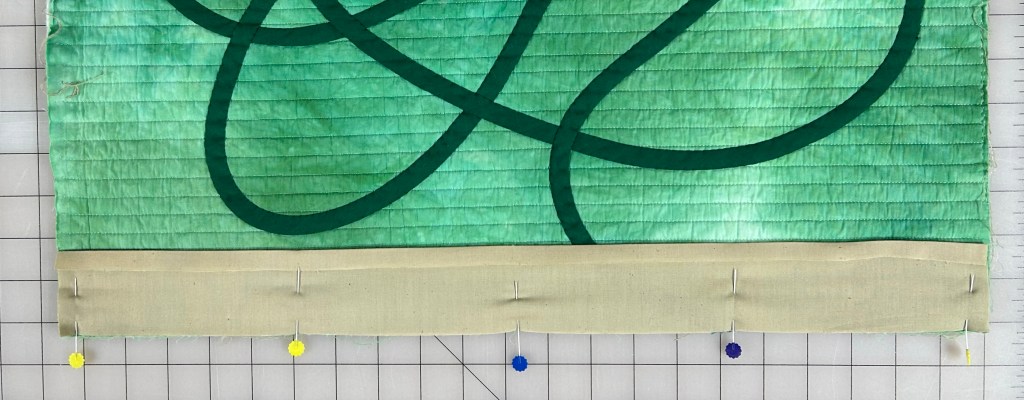
Next I pin pieces to the top and bottom as shown. Tip: cut your facings a quarter to half inch shorter than the width of your quilt and stretch to fit. This helps “encourage “ the edge to roll toward the back when finished. You really don’t want the facing to be seen.
Next add strips to the sides, stretching a bit to fit, and pin.
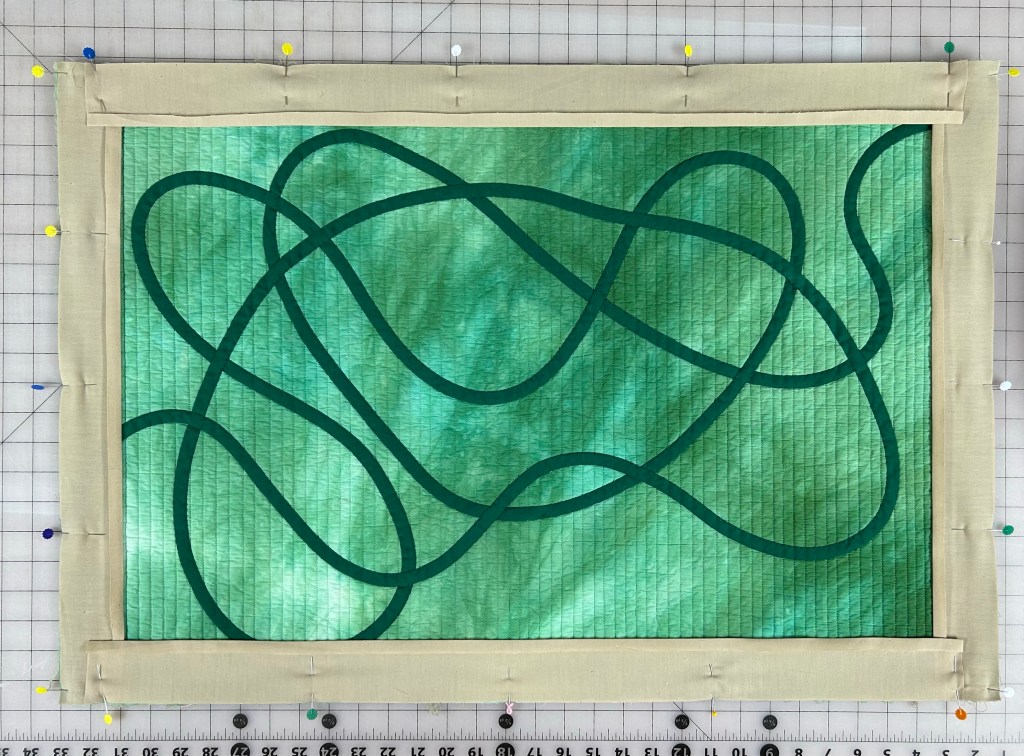
You’ll notice that these pieces don’t go all the way to the corner. They don’t need to and it reduces bulk at the corners this way.
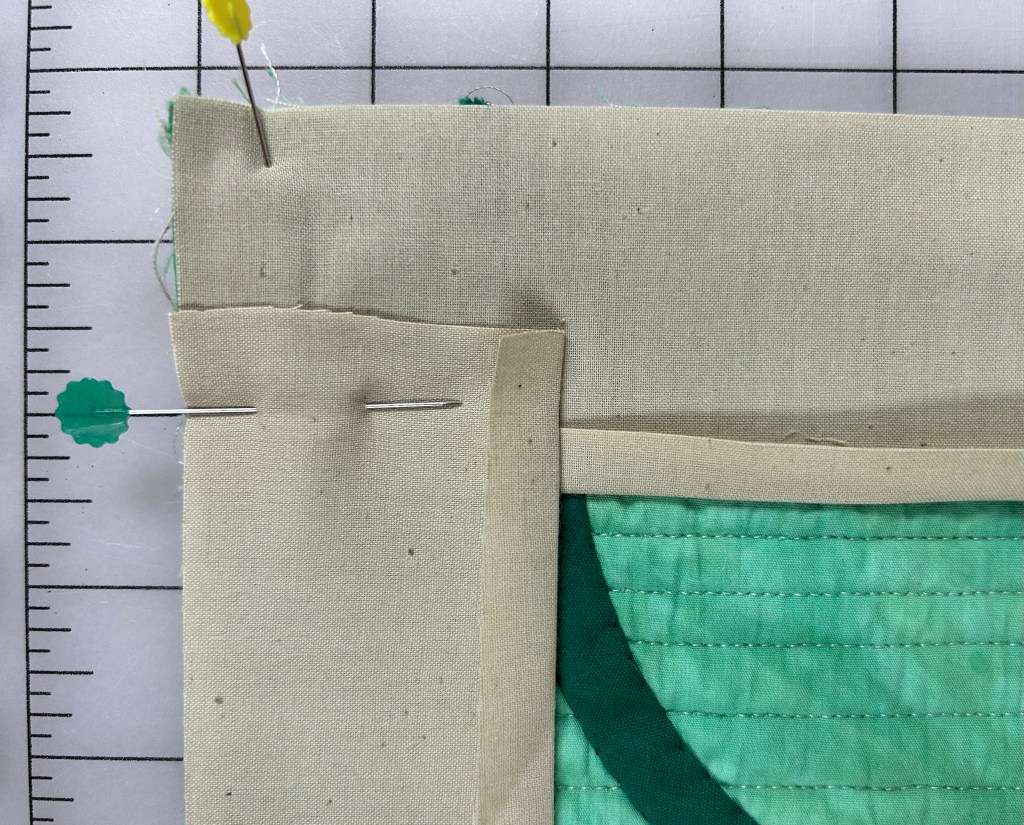
Sew a quarter inch all around the edge and then clip a tiny bit at each corner.

Turn the facing to the back and press. Take your time with this part.

Lastly, slip stitch to the back.

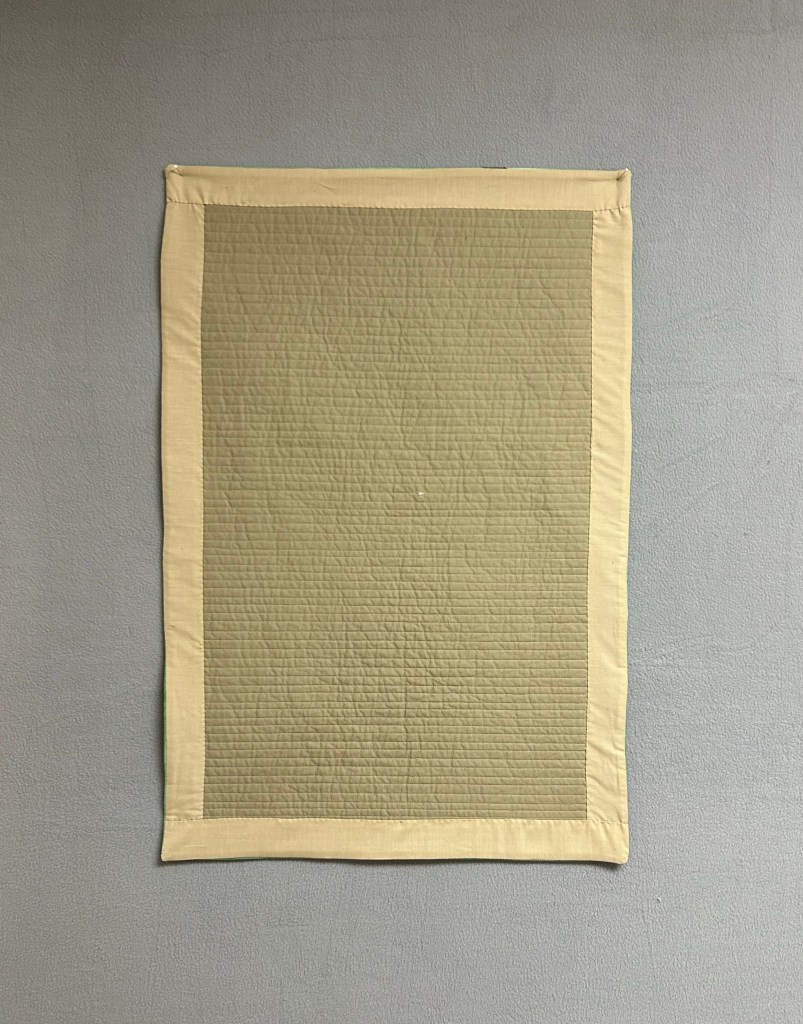
Stand back and admire your work! I hope this helps if you ever need to do a facing.
Have a great day!


Great tutorial! I do enjoy how straight forward your blog is.
thanks for this tutorial.